Página 1 de 1

Freno de Estacionamiento hasta 1944

NotaPublicado: 31 Mar 2011, 22:38
por m606paz
Este es el sistema de freno de mano que utilizaron los willys MB y GPW , desde el comienzo de su produccion hasta 1944.

Un tambor metalico rodeado por una cinta como se ve en el siguiente diagrama

Imagen

Aqui esta montado en la caja de transferencia

Imagen

Como le respondia a Vladimir el Baston/Manija se encuentra en el torpedo y tiene pequeñas diferencias con el encontrado en los vehiculos con el otro sistema de freno posterior.

Imagen

El caño tiene una cremallera de accionamiento más largo y la punta del cable se sujeta, como se observa en las fotografias.

Imagen

Aqui la comparacion con el cable posterior, que es el de más abajo.

Imagen

Saludos :wink:

NotaPublicado: 01 Abr 2011, 14:57
por vladimirsinisi
IM PRE SIO NAN TE!!!

NotaPublicado: 01 Abr 2011, 16:25
por Macario
Esto va a ser uno de los ultimos dolores de cabeza que tenga... 8)
Que espero que sea antes de fin de año

excelente post Mariano :)

NotaPublicado: 01 Mar 2012, 18:05
por m606paz
Recien vero tu respuesta Macario... :oops: Gracias.. :wink:

Esto va para el amigo Vladimir y todos los que tengan que reemplazar la cinta... :wink:

Lew Ladwig escribió:I finished the resto on my parking brake band. I borrowed the rivet tool Heath mentioned. It works great. The tool has a punch that goes in the holder for removing the old rivets. Then there is a drill bit that you use to drill the rivet holes and counter sink them so the rivet head is seated about 1/2 way or more below the brake material. Then there is a anvil and punch for setting the rivet. It worked great and looks just like the original. Imagen
Imagen
Imagen
Imagen
I just need the filister head bolt and the small spring that goes on the horizontal bolt on the right and wire tie it.
Lew


Saludos :wink:

NotaPublicado: 01 Mar 2012, 18:12
por vladimirsinisi
copiado-imprimido y archivado :shock: :D :D
GRANDE MARIANO!!
m606paz escribió:Recien vero tu respuesta Macario... :oops: Gracias.. :wink:

Esto va para el amigo Vladimir y todos los que tengan que reemplazar la cinta... :wink:

Lew Ladwig escribió:I finished the resto on my parking brake band. I borrowed the rivet tool Heath mentioned. It works great. The tool has a punch that goes in the holder for removing the old rivets. Then there is a drill bit that you use to drill the rivet holes and counter sink them so the rivet head is seated about 1/2 way or more below the brake material. Then there is a anvil and punch for setting the rivet. It worked great and looks just like the original. Imagen
Imagen
Imagen
Imagen
I just need the filister head bolt and the small spring that goes on the horizontal bolt on the right and wire tie it.
Lew


Saludos :wink:

NotaPublicado: 02 Mar 2012, 22:32
por Fulpi
Muy bueno Mariano, veo que cambiastes el logo de tu perfil, entre nos el anterior te va mejor. Saludos.

NotaPublicado: 03 Mar 2012, 09:01
por m606paz
Fulpi escribió:Muy bueno Mariano, veo que cambiastes el logo de tu perfil, entre nos el anterior te va mejor. Saludos.


No se por que los muchachos me rebautizaron Ned Flanders... :roll: ....

Ya volveremos al otro Avatar! :wink:

NotaPublicado: 18 May 2012, 16:12
por Fulpi
Se me generó una duda y confusión respecto a la manija y al cable de accionamiento de freno de mano que le corresponde a los modelos fabricados hasta 1944, es decir los modelos a tambor con sunchos exteriores. La consulta sería; que manija y cable les corresponde?

NotaPublicado: 18 May 2012, 16:35
por m606paz
Mario
Como estas?
Me parece... deberia investigar un poco el tema, que el cambio de manija no se produce con el cambio de sistema external ó internal brake.. :roll:

NotaPublicado: 26 Jul 2012, 20:58
por m606paz
vladimirsinisi escribió:
aca armado con unos tornillos ya que los pernos con chaveta no entraban eran cortos :twisted: faltaban como 2 o 3mm para poder poner la chaveta
Imagen
Imagen

es impresionante como frena :shock: hay que ver si se gasta mucho o no despues

ahora voy a ver si hago la pintura para pintar la T84 y el motor y el OD para la reductora y chasis


Los pernos son cortos Vladimir??? :roll:

Imagen

artificer escribió:Imagen

EXTERNAL CONTRACTING HANDBRAKE ADJUSTMENT


 The handbrake adjustment is not difficult and this type of park brake system is very effective if properly adjusted.
 One thing to be aware of is that many people have played with your vehicle before you and there is no guarantee everything is in place properly, is to specification and some bits may be missing altogether.
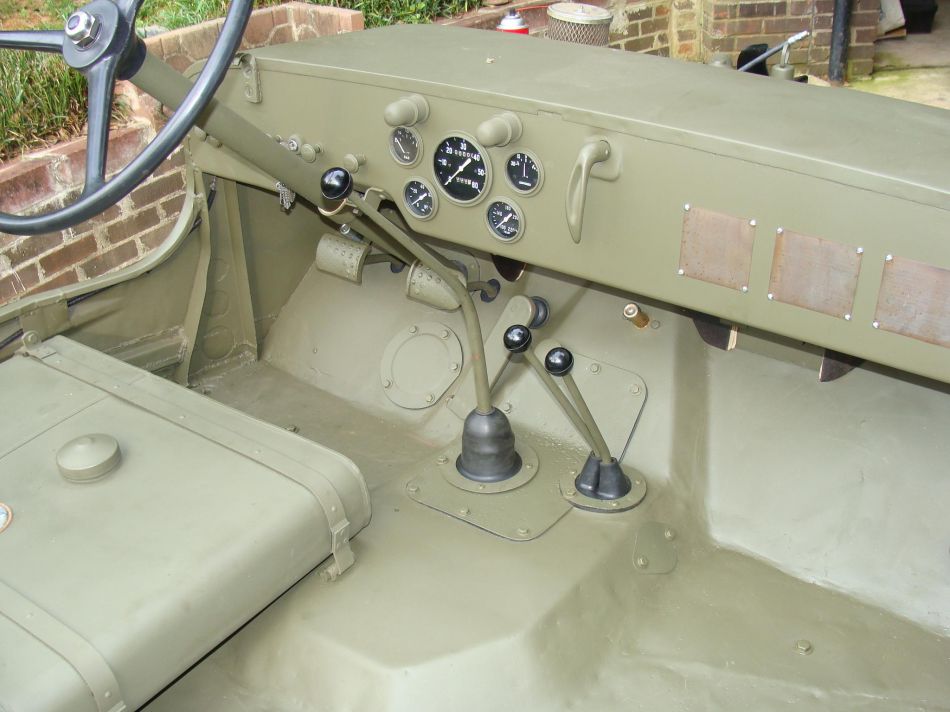
 1. Check the operation of the handbrake lever and pawl locking mechanism. Note: When applying the h/b always turn handle ¼ turn (the same as you do when releasing) then turn back to lock when application is complete. This will save pawl wear and tear.
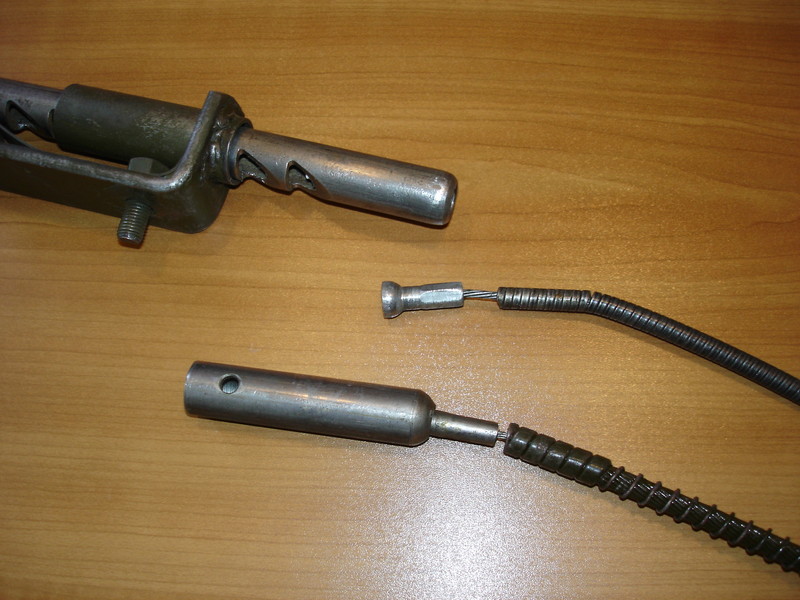
 2. Establish that all cable attachments are in place, tight and that the outer cable is firmly secured at the firewall and other extremity.
 3. Lubricate between the inner and outer cables ensuring free easy movement (this lube should be done on an ongoing service basis).
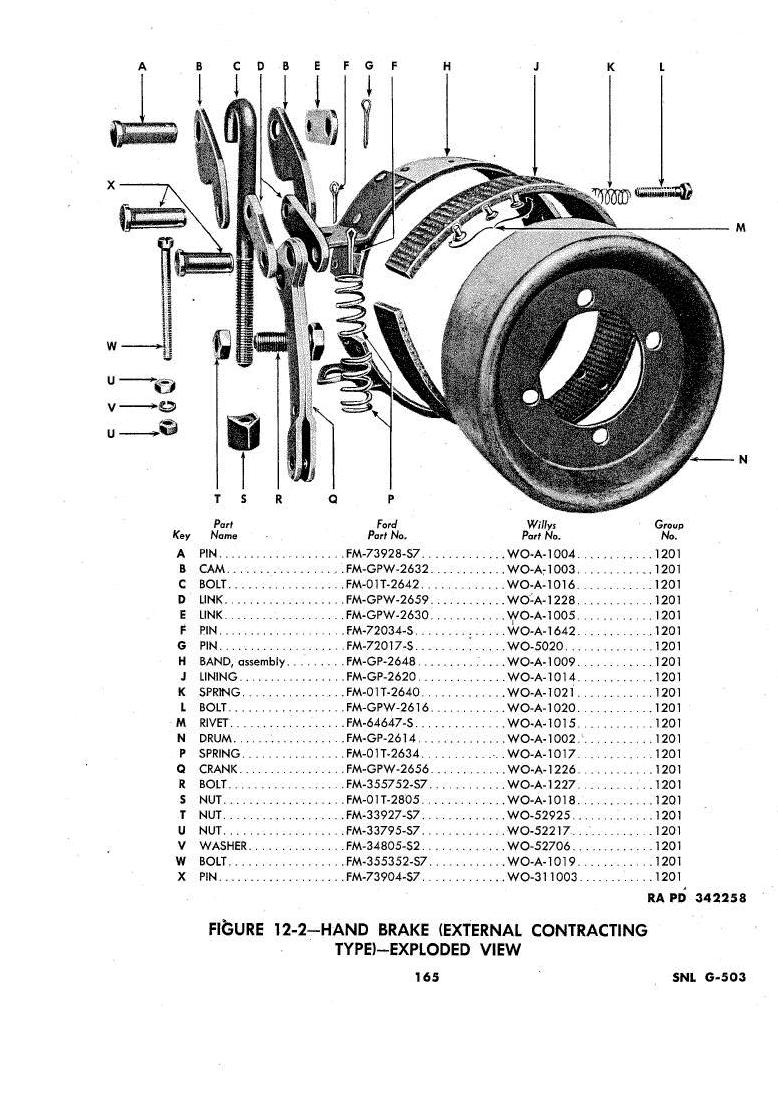
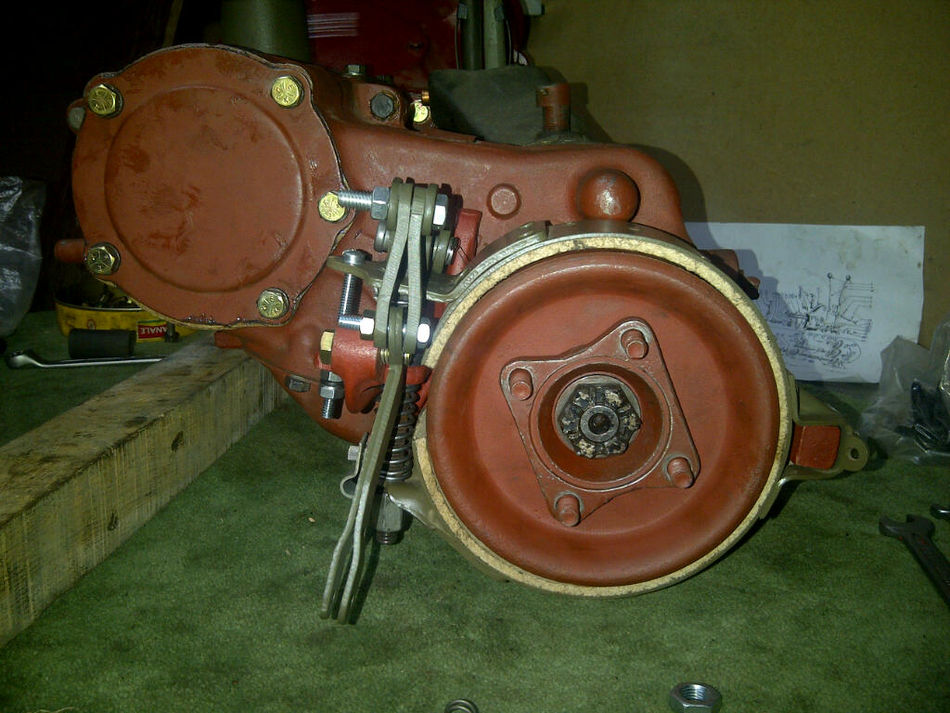
 3. Disconnect the cable at the drum end. This ensures the cams (4) etc. are all in the off position.
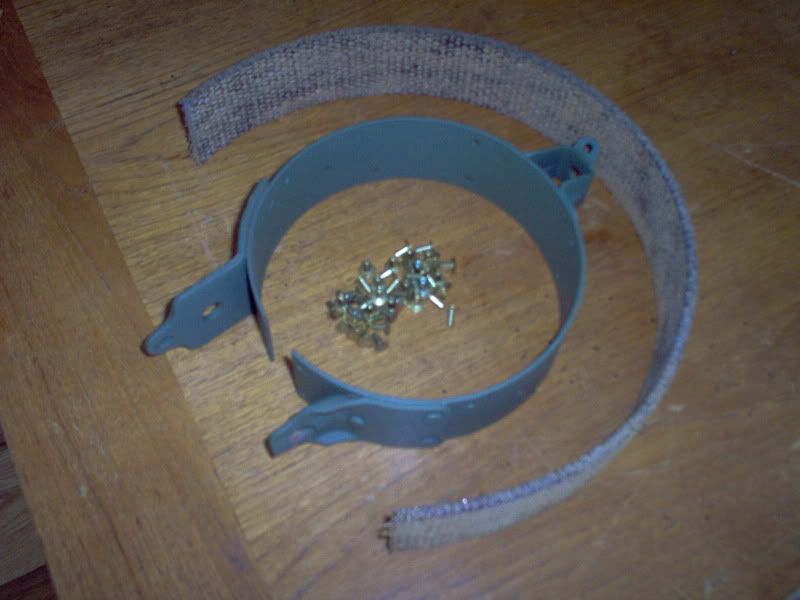
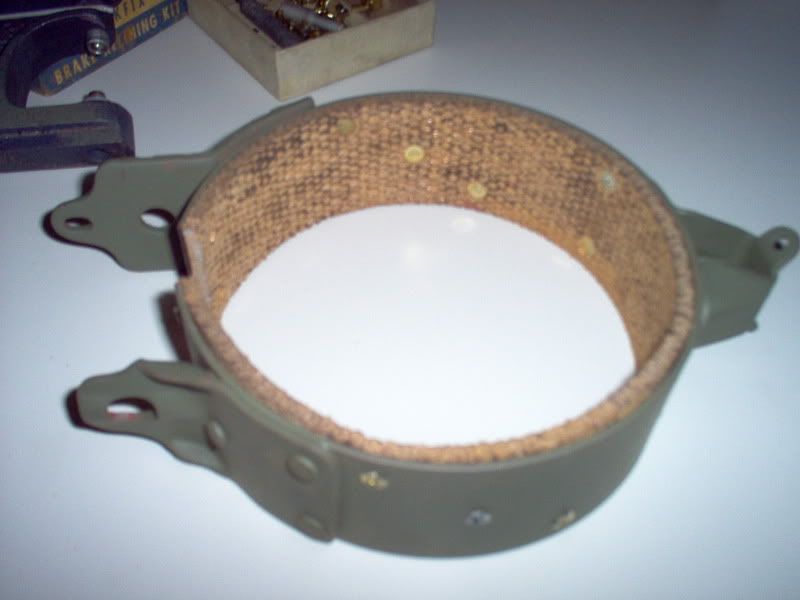
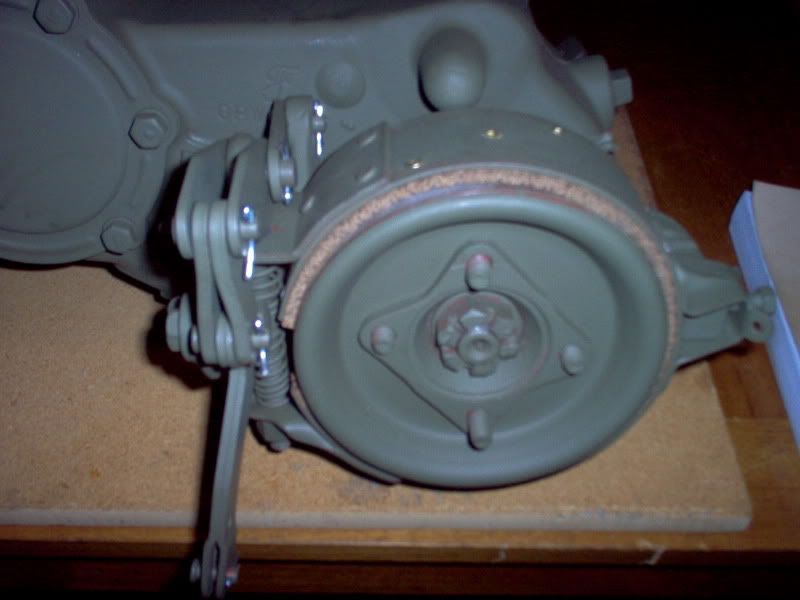
 4. Check the brake band is in place correctly, right springs and all hardware attached.
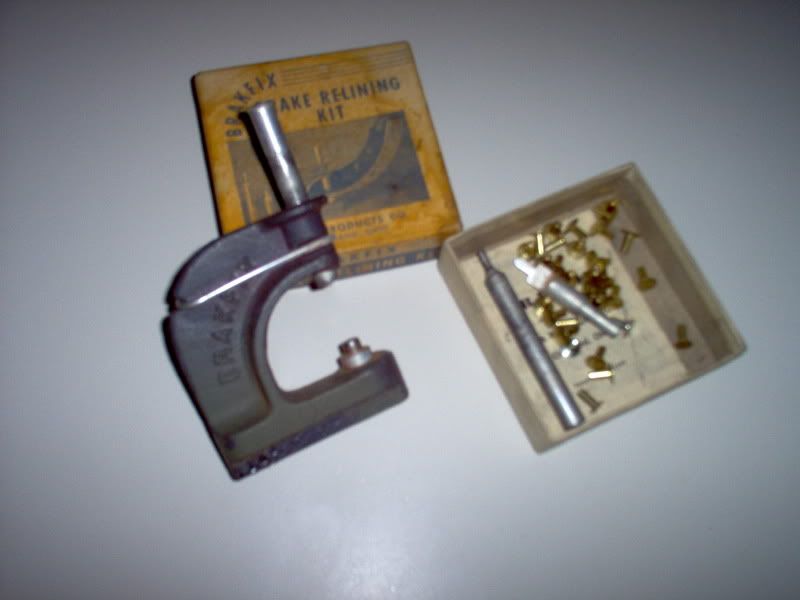
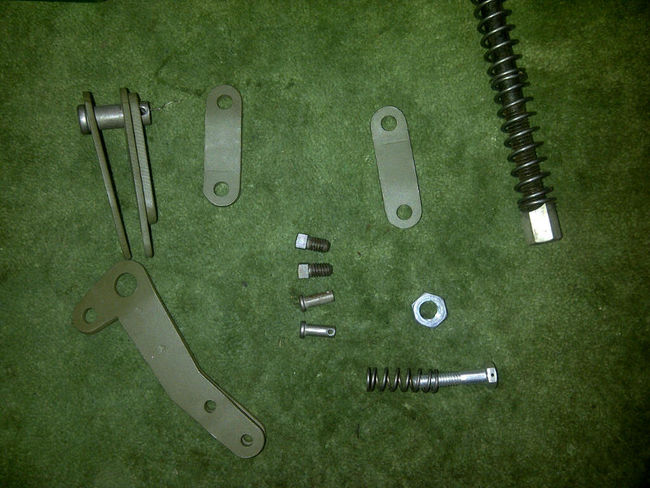
 5. Elongated or oval holes and worn clevis pins (4&5) and such may need components to be removed and holes built up, re-drilled and pins replaced.
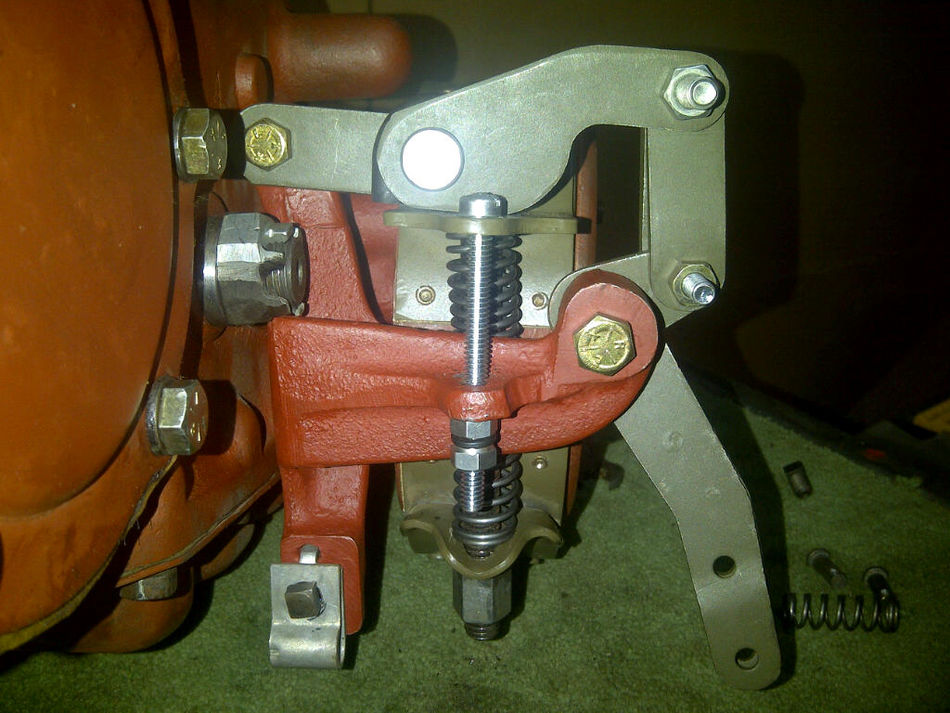
 6. Anchor (1) is your first point to adjust and there are two things of importance: Clearance between transmission lug to band attachment should be no more than .005” if larger remove band and adjust this gap by squeezing in vice, gentle persuasion or other suitable method.
 When fitted there is between .005” and .010” clearance drum to lining at that (anchor) point. Lock wire must not be overtightly attached or binding!
 7. Adjust nut (2) until the lining just binds with the drum then;
 8. Adjust screw (3) until the head engages on the band and the nut and locknut are just snug against the bracket (6). Clearance should be around .010” when this happens.
 9. Back off Number 2 two full turns or give the lining approximately .010” clearance and the drum should turn freely.
 10. Re-attach the cable and if it doesn’t match-up properly the cable outer cable positioning needs altering so everything lines up.
 11. The original MB/GPW cable was not adjustable but by now most have had modifications done so that it can be.
 12. This brake is meant for parking and should not be applied when the vehicle is in motion unless an emergency situation.
 13. The faster you are going the harder they wrap on.
 14. They are very effective and serious damage may result.
I have seen a truck tailshaft which looked like a corkscrew.
If you don’t have any hastles < 20 minutes.

NotaPublicado: 26 Jul 2012, 21:39
por vladimirsinisi
si Mariano,
solo los WO-311003, limando un poquito A1228 ya entran es muy poquito por lo que no entra la chaveta
el A1004 esta bien :wink:
me falta el que va en el A-1005
y el A-1020 y A1021 no se donde van :oops:

a ver si con esta foto ves el tamaño
Imagen

NotaPublicado: 26 Jul 2012, 22:12
por m606paz
Hay algo repro en alguna de esas piezas??? :roll:

NotaPublicado: 26 Jul 2012, 23:10
por vladimirsinisi
Si Mariano,
todas las piezas son de Ron menos el Drum que es lo unico que pude rescatar de la caja de transferencia ford de mi amigo que le puso al UAZ, todo el sistema se lo compre a Ron menos la cinta que se la compre a Peter

NotaPublicado: 27 Jul 2012, 13:42
por vladimirsinisi
Ahi encontre en el manual la A1020/1021 son las que apretan la banda de freno del costado, en la imagen que subio mariano la figura que esta marcada con el numero 1 (anchor).
tambien saque las medidas de los pin para ver si los puedo hacer :wink: