Página 1 de 2

Desarmado y armado de llantas de combate

NotaPublicado: 06 May 2009, 22:58
por m606paz
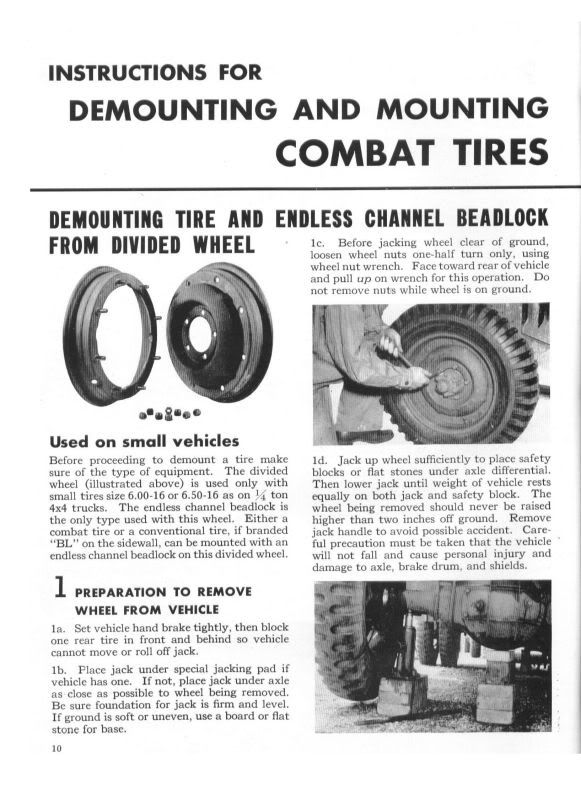
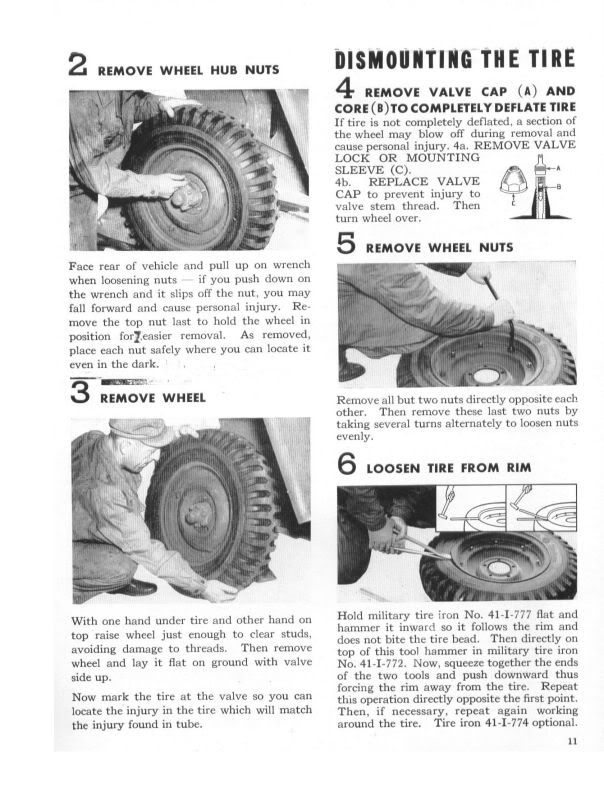
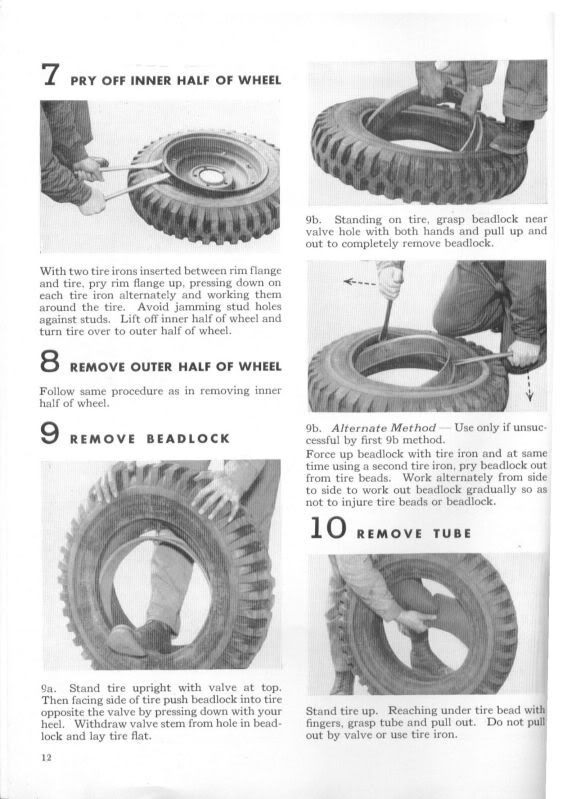
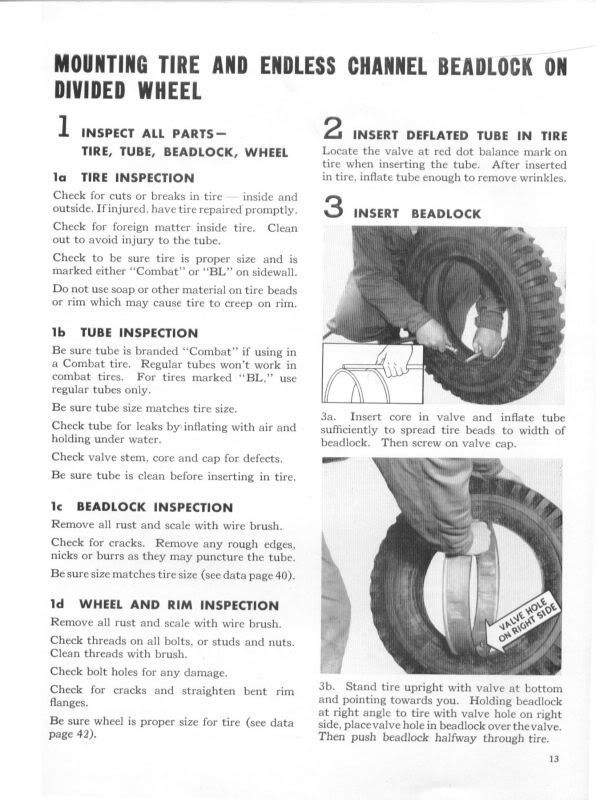
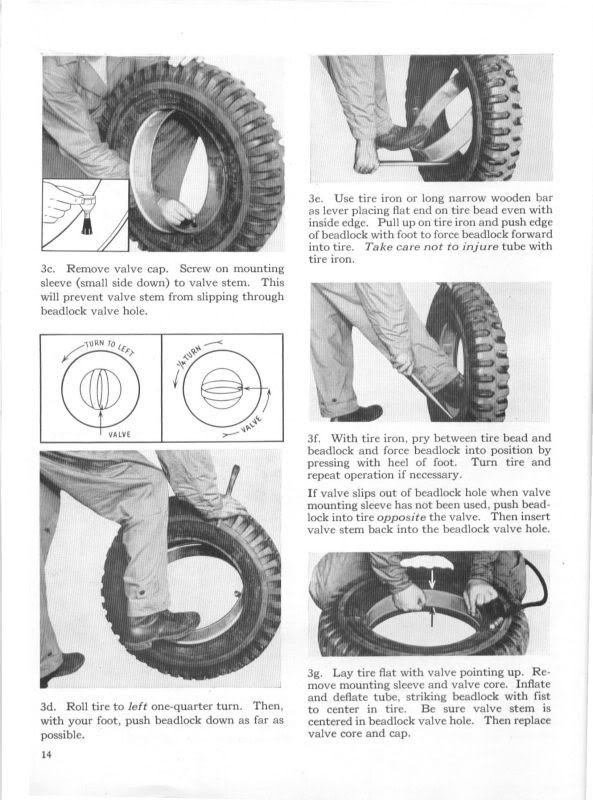
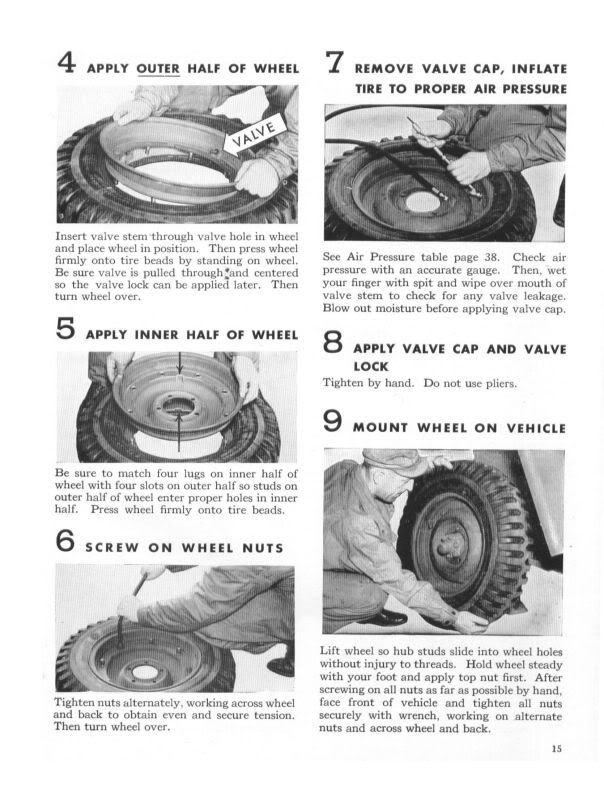
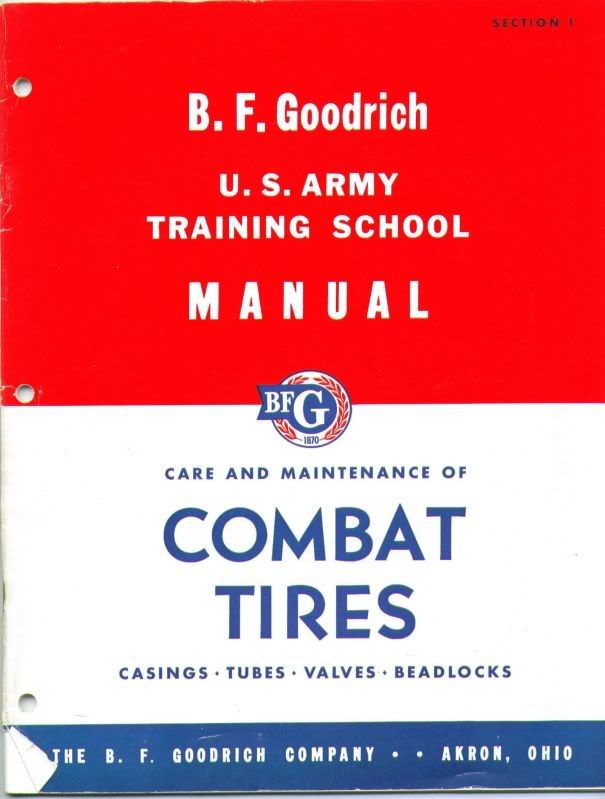
Las imagenes a continuacion , son bastante descriptivas
Imagen

Imagen

Imagen

Imagen

Imagen

Imagen

Imagen

Saludos

NotaPublicado: 23 Jul 2009, 21:22
por Pablo.GPW
Escelente material Mariano!

Pregunto, vos tenes los BEADLOCKS? Si no los tenes, que pusiste en su reemplazo?

En el manual no vi el torque de los 8 bulones que unen ambas secciones, asi que lo aporto!

TORQUE DE LOS BULONES

When you put your combat rims together you should use a torque wrench and set the bolt to 60-70 ft. lbs.

[img][img]http://img199.imageshack.us/img199/958/tires2.jpg[/img]
[/img]

Saludos!

NotaPublicado: 23 Jul 2009, 22:30
por m606paz
Hola Pablo
Aun no he desarmado las llantas asi que no se con que me encontrare!!
Tendran aun los Beadlocks????
Si no las tienen..se podran armar sin????
Ahora me dejaste con la duda.... voy a tener que desarmar una al menos!!!

Saludos 8)

NotaPublicado: 24 Jul 2009, 00:32
por Pablo.GPW
:D

Supongo que es una solucion permanente y diseñada para el mismo fin que los famosos "manchones" que ponen los gomeros.

Sin ir mas lejos, en las bicicletas/motos se protegen las camaras del posible daño causado por los cabezales de los rayos con un sistema similar...

Y si no estan... vemos!
No son faciles de copiar, el cilindrado en dos direcciones, o el cilindrado de una pieza plegada no te lo hace cualquiera.
Y los Beadlocks tienen unos relieves para que no se cizalle la camara.

Un Abrazo!

NotaPublicado: 24 Jul 2009, 14:00
por ecn1960
Hola, como estan:
Cual era el objeto de fabricar las llantas en dos mitades?, las cubiertas originales tenian mas talon?. Me parece mas dificil desarmar todo eso que destalonarlas.
Saludos

Llantas combat type

NotaPublicado: 24 Jul 2009, 14:26
por dongaston70
Si alguien necesita una persona de confianza que haga llantas a medida, y sin problemas podria fabricar los famosos "beadlocks" me avisan.
Resulta que aca en el pueblo estamos restaurando un automovil frances Gobron modelo 1909 (uno de los siete que quedan en el mundo). Era de Marcelo T. de Alvear y fue donado en 1971 al pueblo por una descendiente. Recien ahora, un grupo de coleccionistas/restauradores le pudimos meter mano. En su momento era de mayor lujo y valia el doble que un Rolls-Royce... :shock: :shock: :shock:
Pues bien, volviendo al tema, en ese lugar nos fabricaron las llantas y quedaron perfectas. Trabaja para los mejores restauradores del pais y no es caro.
Asi que cualquier cosa, me avisa.
Lo de las llantas desarmables, "combat type", era para que no se destalonen las cubiertas al pincharse y cointar con cierta capacidad "run flat". Ademas, eran mas seguras que las llantas con aro.

Saludos desde La Pampa
Gaston

NotaPublicado: 24 Jul 2009, 15:23
por Pablo.GPW
Hola Gaston, gracias por la explicacion.

Supongo como punto importante tambien que el caucho en esa epoca era mucho mas duro que el de ahora.

Saludos!

NotaPublicado: 24 Jul 2009, 20:36
por ecn1960
Si ahora se entiende.
¿Se pueden desrmar como una comun, destalonandola y con barretas o desarmadora o hay que separar las mitades indeflectiblemente?. Evidentemente algo cambio, porque los modelos posteriores no las trajeron.
saludos

NotaPublicado: 23 Ago 2011, 13:46
por m606paz
Enrique
Recien leo tu pregunta... :cry:
Calculo que la contestacion a tu pregunta es NO.
Al menos siempre las desarman para arreglar una pinchadura..
¿Por qué no las siguieron utilizando? ....nunca lei una respuesta al respecto..

Les dejo el video del armado de una llanta Combat.

<embed src="http://www.youtube.com/v/1B3S12u9GbI?version=3&amp;hl=es_ES&amp;rel=0" type="application/x-shockwave-flash" width="480" height="390" allowscriptaccess="always" allowfullscreen="true"></embed>

Ni en USA se han molestado en conseguir los Beadlocks...

Saludos :wink:

NotaPublicado: 23 Ago 2011, 18:45
por ecn1960
Muy instructivo el video, una imagen..........................................
Al momento de mi pregunta, nunca habia visto una llanta de cerca, lo de destalonarla es imposible ya que carece de garganta para ese fin, algo aprendi hasta ahora :wink:
Saludos

NotaPublicado: 23 Ago 2011, 18:58
por martinelterrible
impresionante la velocidad de armado!!!!!

NotaPublicado: 24 Ago 2011, 22:41
por Sebastian36
Yo tengo 4 de estas y no tienen esos aros protectores y las arme sin problemas solo hay que echarle algo de aire para que al unir las dos mitades no se pellizque la camara

NotaPublicado: 28 Ago 2011, 08:59
por anadiomene
aquí encontre otro video sobre el montado del famoso DLBENSINGER

<embed src="http://www.youtube.com/v/INJlKOLp-JA?version=3&amp;hl=es_MX&amp;rel=0" type="application/x-shockwave-flash" width="480" height="390" allowscriptaccess="always" allowfullscreen="true"></embed>

NotaPublicado: 24 Nov 2011, 21:18
por m606paz
Y esto se hace cuando no podes desarmarla!! :cry:

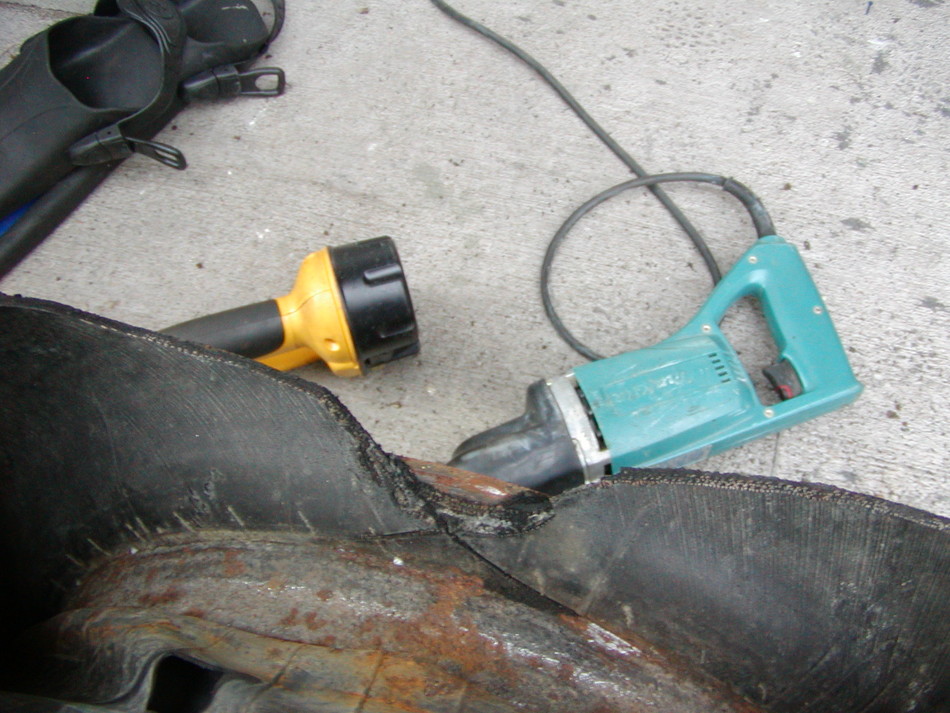
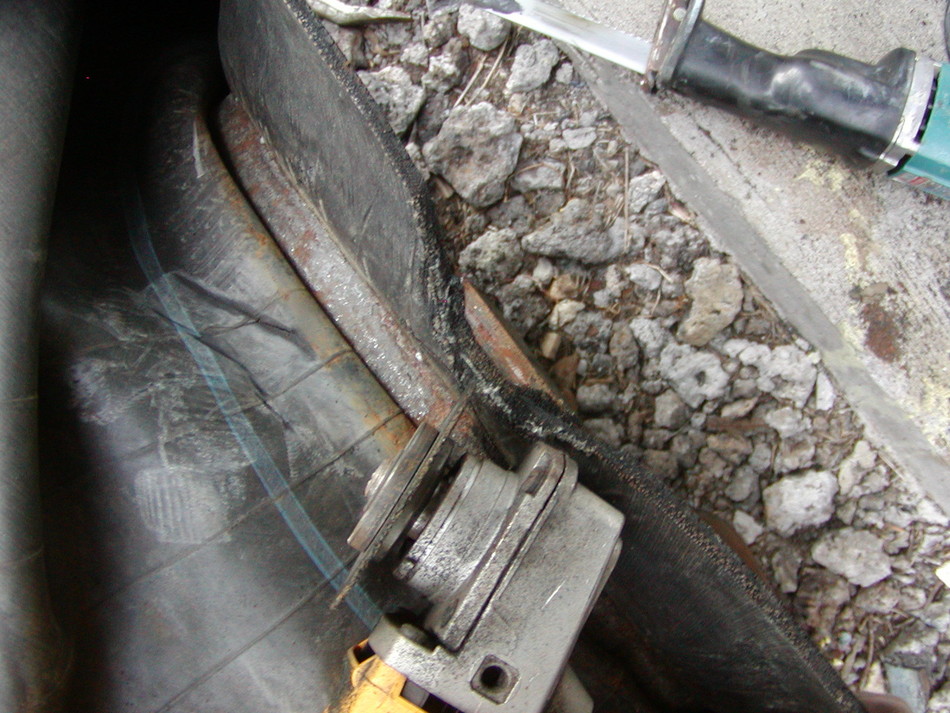
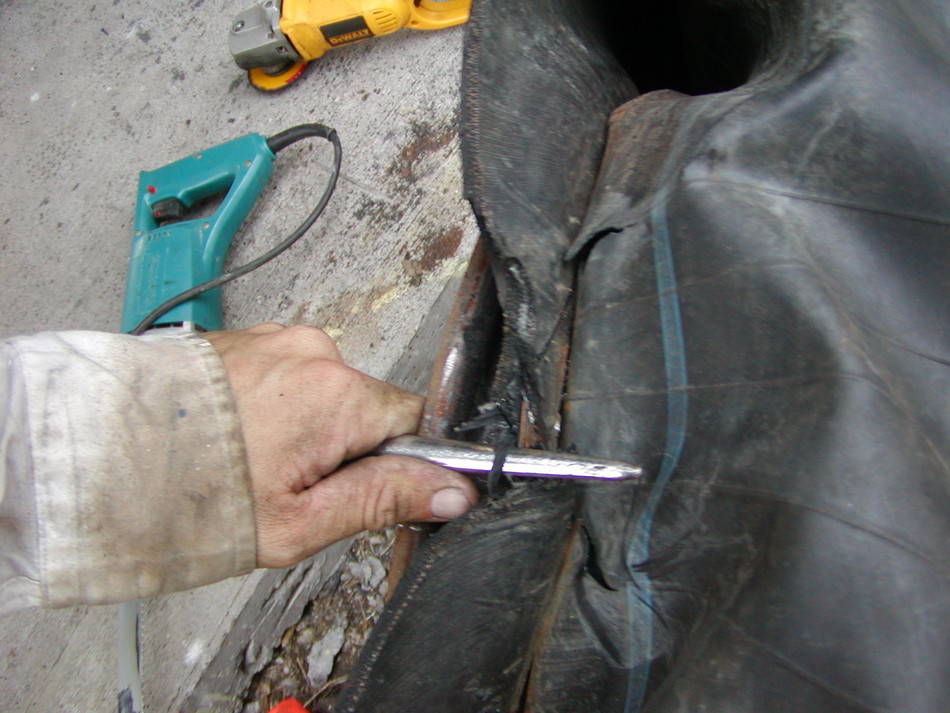
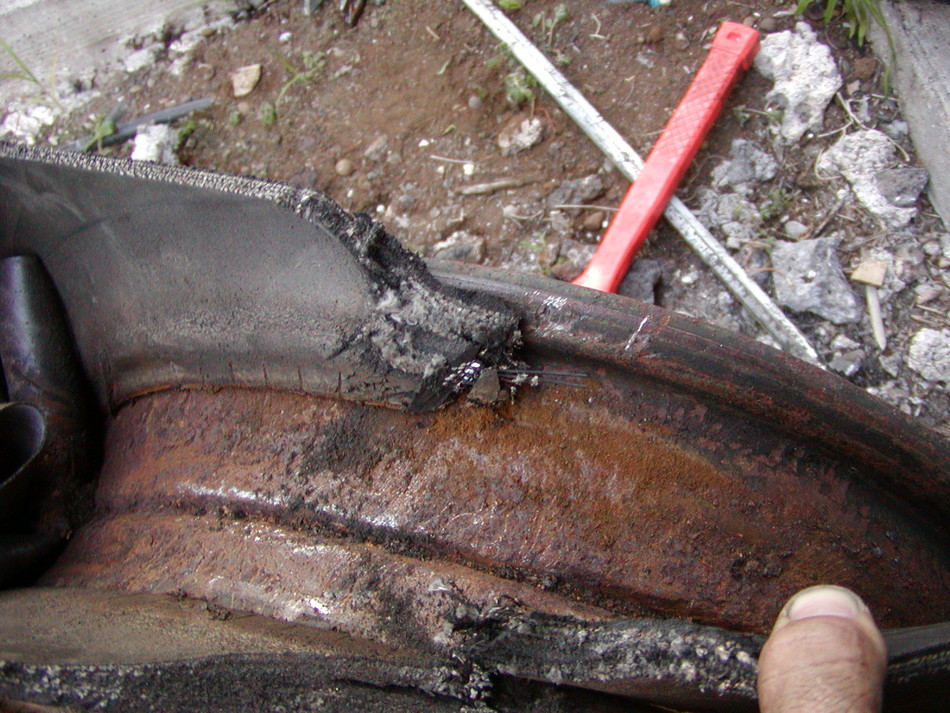
Noah M escribió:Well I remember there was a thread about this not too long ago with lots of questions and we all rambled on and on as usual and it went from this to that and the answer was never really given so i thought i would take some photos and show you guys how I do it, I know there are lots of different ways, but this is what I do with the tools at hand.


Imagen

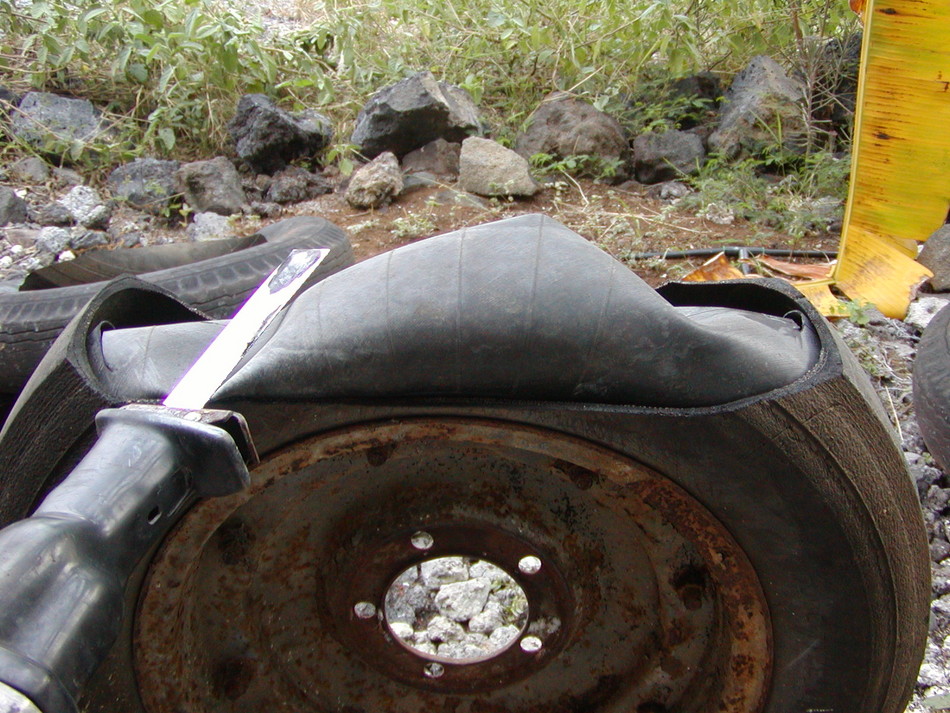
First. Cut the top of the tire off down to the rim with your trusty sawzall

Imagen

Second. Cut out a "v" in the rubber down to the steel bands that run around the tire on the bead. I use a long blade on the saw as it is more flexible than a short one and will bend along the "valley" of the rim and i can cut very close without cutting the rim, and the friction takes some of my rust off :lol:

Imagen

Imagen

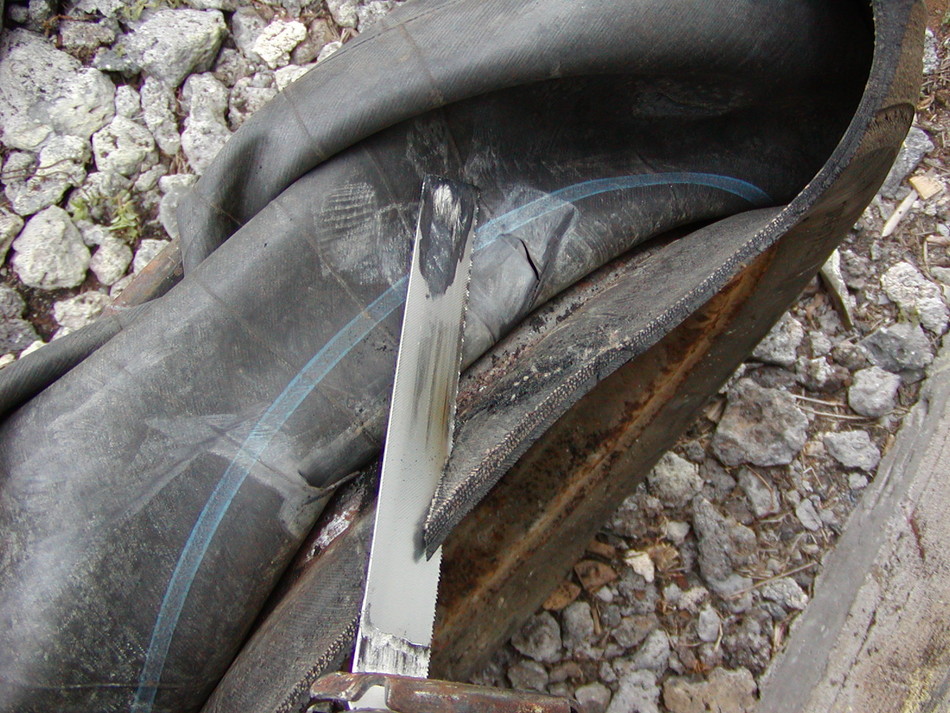
Third. Use an angle grinder with a cutting wheel (i know its tiny but it gives me better control with it being a small wheel. We dont want to grind the rims! )
Cut until you see no more sparks and then you know its cutting the rubber and only has 1/8 of an inch before we hit rim so you stop there. It has been my experience that 75% of the time I feel the tire let go when i cut through the bands and know right away to stop, but the no spark method also works a treat. I also leave the tube in place so that i dont accidentally grind the rim

Imagen

Fourth. Use a bar to break the 1/8 of an inch rubber that remains

Imagen

Fifth. Pull it off the rim, you can see i missed two wires on this one but they were easily broken with my bar.

Imagen

Sixth. Dispose of rubber properly and then look at your wheel in horror as you behold your rust and realize that now you need to throw her in the sandblasting booth, or take her out in the yard for a sandblasting like I do since I have no booth. :)

Imagen

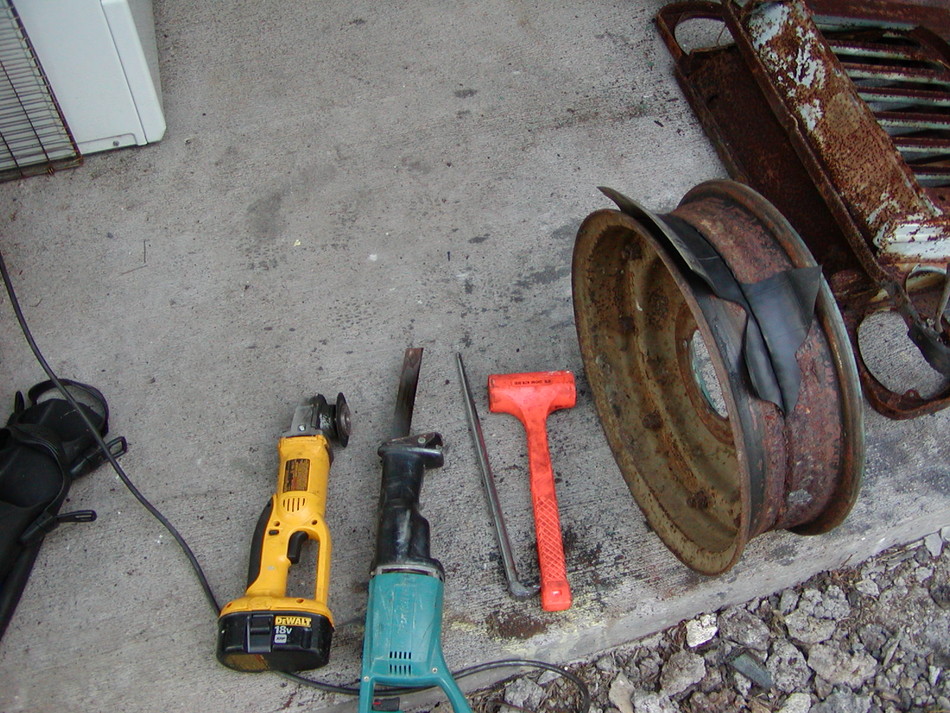
These are the tools I use, I use the hammer to pound my bar under the rubber when the rubber is rusted or stuck on the rim..which is most times. I have removed alot of tires this way and have yet to damage a rim. But I am careful and dont try to hurry. It takes me about 30 minutes to do 5 wheels.
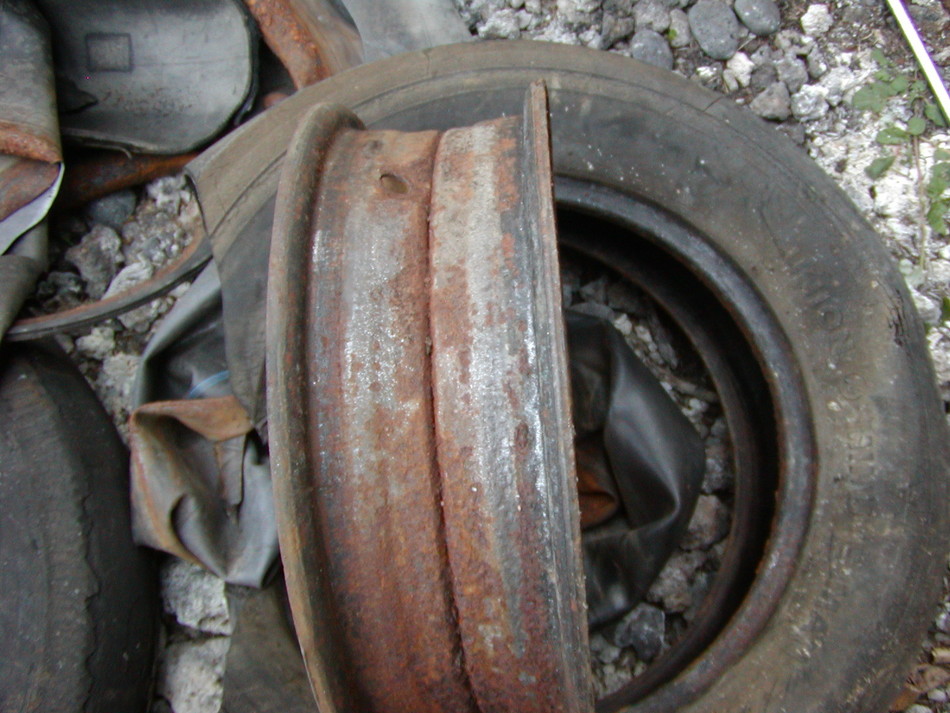
You can see that when this wheel was put together the tube protector was pinched. I find this to be the case quite frequently, and on wheels with no tube protector I have seen the tubes pinched! This is an example of how you need to be careful when you reassemble your wheels. If you dont, it could lead to some unpleasent events. :shock:
Hope this helps some people out and saves you $10 a wheel at the tire store, please donate your savings to Ron :wink:
Aloha!


Asi lo tuve que hacer yo Vladimir!!

Re: Desarmado y armado de llantas de combate

NotaPublicado: 06 Oct 2013, 10:15
por m606paz
Ayer me toco armar 6 llantas combat!
Claro, no tengo los BEADLOCKS, pero si tenia dos protectores de camara.
Las que arme sin protector, te lleva mucho tiempo acomodar la camara para que no quede entre medio de la union de las llantas y correr el riesgo que se pellizque.
En cambio las dos que arme con beadlocks,se arman con facilidad y rapides.
Asi que tener en cuenta de usar protectores de camara !

Son algo así

Debo fotos, pero como quedaron tres sin este protector,no faltara oportunidad de detallar el armado!

Saludos :wink: